Magento: Custom Static block controlled from admin
Sometimes, we want to edit the content of a static block in an easy way, such as how we are able to edit information in the header and footer blocks in the System > Configuration > Design section.
This can be done by adding a custom group with input fields so that we can put our content, titles, and images into separate fields. For example, we can place our custom block group under Footer options (System > Configuration > Design section). Our block configuration panel would look like this:

Let’s create a regular Magento module. The module directories’ structure would be rather simple and consist of only 3 config files, as follows:
app/etc/modules/Ir_Banner.xml
app/code/local/Ir/Banner/etc/config.xml
app/code/local/Ir/Banner/etc/system.xml
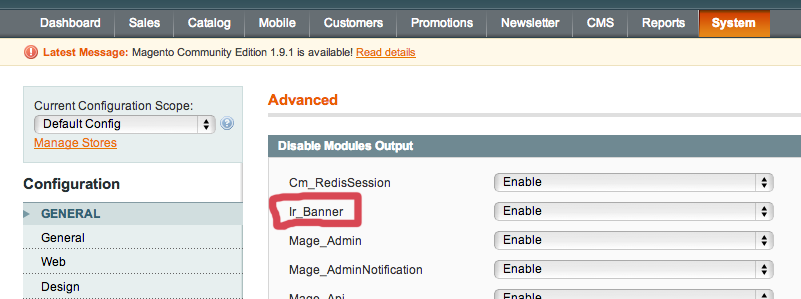
The first file (Ir_Banner.xml) tells Magento that an additional module is installed. This file is responsible for module enabling/disabling, module folder location and dependency from other modules. Actually, you can omit the dependency option, as it’s not critical at this point; it affects modules’ loading order only. The file will look like this:
<!--
app/etc/modules/Ir_Banner.xml
-->
<?xml version="1.0"?>
<config>
    <modules>
        <Ir_Banner>
            <active>true</active>
            <codePool>local</codePool>
        </Ir_Banner>
    </modules>
</config>
The next file is a module config file and does not have much code either:
<!--
app/code/local/Ir/Banner/etc/config.xml
-->
<?xml version="1.0"?>
<config>
    <modules>
        <Ir_Banner>
            <version>0.0.1</version>
        </Ir_Banner>
    </modules>
</config>
Basically, we are done with the simplest Magento module. At this point, it has no functionality except this:
The last file is system.xml
This file defines what input fields we use, as well as the names and types of these fields, groups, and group properties, such as the label in the group pane heading and what section this group belong to:
<!--
app/code/local/Ir/Banner/etc/system.xml
-->
<?xml version="1.0"?>
<config>
    <sections>
        <design>
            <groups>
                <homepage_banner>
                    <label>Homepage Banner</label>
                    <frontend_type>text</frontend_type>
                    <sort_order>300</sort_order>
                    <show_in_default>1</show_in_default>
                    <show_in_website>1</show_in_website>
                    <show_in_store>1</show_in_store>
                    <fields>
                        <status translate="label">
                            <label>Status</label>
                            <frontend_type>select</frontend_type>
                            <source_model>adminhtml/system_config_source_yesno</source_model>
                            <sort_order>1</sort_order>
                            <show_in_default>1</show_in_default>
                            <show_in_website>1</show_in_website>
                            <show_in_store>1</show_in_store>
                        </status>
                        <title translate="label">
                            <label>Banner Title</label>
                            <frontend_type>text</frontend_type>
                            <sort_order>2</sort_order>
                            <show_in_default>1</show_in_default>
                            <show_in_website>1</show_in_website>
                            <show_in_store>1</show_in_store>
                        </title>
                        <content translate="label">
                            <label>Content</label>
                            <frontend_type>textarea</frontend_type>
                            <sort_order>30</sort_order>
                            <show_in_default>1</show_in_default>
                            <show_in_website>1</show_in_website>
                            <show_in_store>1</show_in_store>
                        </content>
                        <background_image translate="label">
                            <label>Background Image</label>
                            <frontend_type>image</frontend_type>
                            <backend_model>adminhtml/system_config_backend_image</backend_model>
                            <upload_dir config="system/filesystem/media" scope_info="1">homepage_banner_backgrounds</upload_dir>
                            <base_url type="media" scope_info="1">homepage_banner_backgrounds</base_url>
                            <sort_order>1</sort_order>
                            <show_in_default>1</show_in_default>
                            <show_in_website>1</show_in_website>
                            <show_in_store>1</show_in_store>
                            <comment>Recommended image size is 300 x 200 px.</comment>
                        </background_image>
                    </fields>
                </homepage_banner>
            </groups>
        </design>
    </sections>
</config>
As you can see, we can add custom fields and groups to existing sections. We can also add custom sections, but this requires an ACL configuration defined in our custom module config.xml, or a special file for this purpose, adminhtml.xml. However, all Magento core modules use adminhtml.xml for ACL definition. The existing section we want to use is design, but the homepage_banner is our custom group. The XML inside <fields></fields> section is a definition of the input fields displayed in the group homepage_banner.
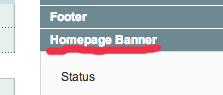
We can also set a label of the group showing options and sort order (our case is after the Footer group). The field definition section (for example, status) has options that define what kind of input we want to use.
Label– the text we will see as a label for the input fieldfrontend_type– the input type we use. In our case, the field status is a dropdown selectionsource_model– the php class that will be used as the data source for dropdown options. The class must implement method toOptionsArray(). In our case, we use one of the default source models, Yesno, but we can use any source model in Magento or create a custom model.sort_order– order in the groupshow_in_default, show_in_website, show_in_store– visibility options when we have multiple stores
There are many other field options available, but the options we can set depend on the type of the field. For example, the source_model option is only for the select and multiselect frontend_type. The field with the frontend_type image has specific options:
upload_dir– relative path to the image in the media folder.homepage_banner_backgroundsis the name of the folder that will be created automatically under media. Therefore, the full path of the image ismedia/homepage_banner_backgrounds/default/filename.jpgbase_url– image url. We can specify this independently from the file path. Therefore, the url to the image in this example ishttps://domain.dev/media/homepage_banner_backgrounds/default/filename.jpg
The field “Next step” displays our block on the front end. The easiest way to do this is with content directives, which we can insert into any page in CMS > Pages, for example.
<h3>{{config path='design/homepage_banner/title'}}</h3>
<img href="{{store url=''}}/{{config path='design/homepage_banner/background_image'}}”/>
Let’s take a look at the directive config {{config path='design/homepage_banner/title'}} we can see the path property here. Now, let’s take a look at our system.xml file:
<!--
app/code/local/Ir/Banner/etc/system.xml
-->
<?xml version="1.0"?>
<config>
    <sections>
        <design>
            <groups>
                <homepage_banner>
                    ...
                    <fields>
                        ...
                        <title translate="label">
                            ...
                        </title>
                        ...
                    </fields>
                </homepage_banner>
            </groups>
        </design>
    </sections>
</config>
As we can see, the path in the config directive reflects the path in the .xml tree like this: path='section_name/group_name/field_name'.
Another way to show the block is in the *.phtml template. We can use the same HTML snippet from above. To get the config values, we can use the standard Magento method:
<h3><?php echo Mage::getStoreConfig('design/homepage_banner/title'); ?></h3>
Sincerely,
Itera Research team